
1.4K
You can delete the DNS cache on Android in various ways. Deleting it can help if you have connection problems with a website
Deleting the DNS cache on Android: How to proceed
Clearing the DNS cache on your Android smartphone can be helpful if a website such as Google no longer loads, but the Internet otherwise works without any problems. The easiest way to clear the DNS cache is to activate flight mode on Android.
- To do this, pull down the notification bar from the top and tap the “Offline mode” button with the airplane symbol.
- Wait ten to fifteen seconds and then deactivate flight mode again.
- Your smartphone will now reconnect to the Internet. This should also clear the DNS cache.
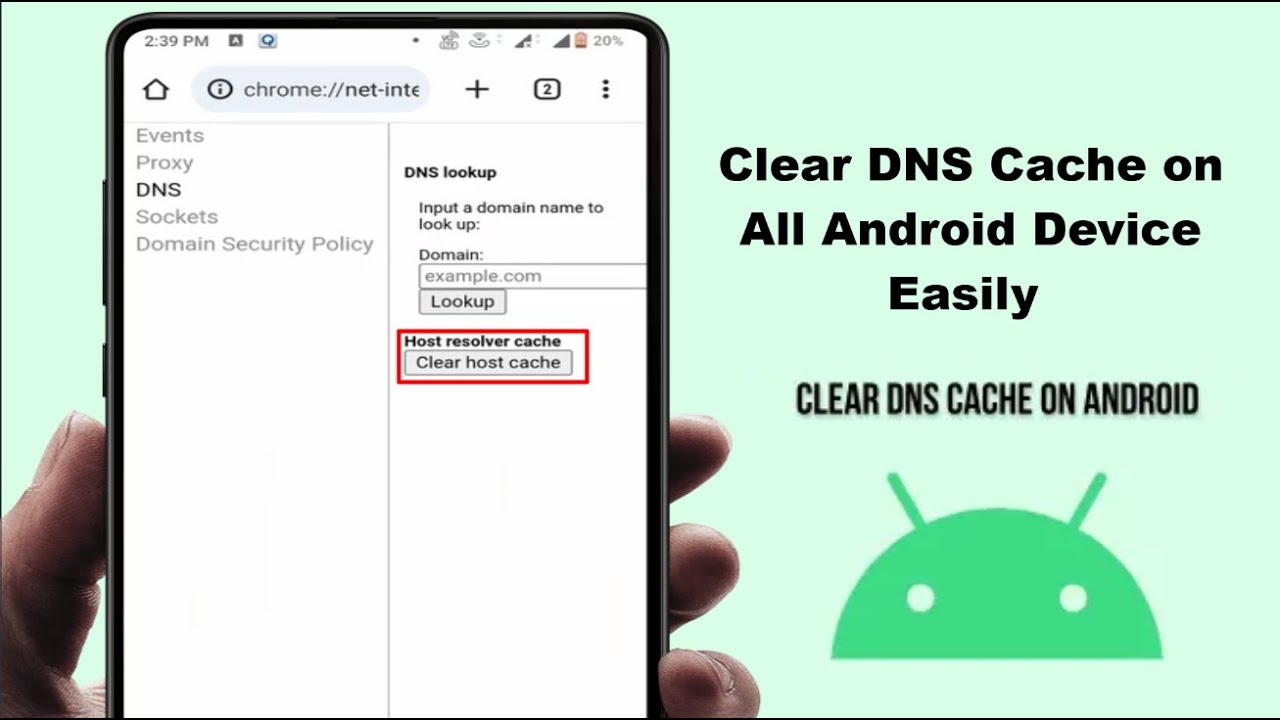
- If this does not work, you can also delete the cache manually in the browser. If you are using the Chrome browser, call up the URL “chrome://net-internals/”.
- Tap “DNS” in the menu on the left.
- Then select the “Clear host cache” button.
Deleting the DNS cache in another browser: How to do it
If you use a different mobile browser instead of Chrome, you cannot delete the DNS cache using the URL specified above. Alternatively, you can clear the app cache. This will remove all temporary files, including the DNS cache.
- To do this, open the settings and tap on “Apps”.
- A list of all installed apps appears. Tap on the browser that you use by default.
- Tap on “Storage space” and select “Empty cache”.
Delete DNS cache: When it makes sense
The DNS cache rarely needs to be deleted. Normally it is even very helpful.
- Because temporary files are stored there. This allows you to connect more quickly to websites that you have already accessed.
- Sometimes the DNS cache can also lead to connection problems. This is often due to outdated DNS entries. If you can no longer access a website, it can therefore help to delete the DNS cache.