
1.9K
If the power supply of your PlayStation 4 is defective and you want to replace it, first try to make a warranty claim.
PlayStation 4: How to uncover the power adapter
Should you not be entitled to a repair within your warranty, you can replace the power supply like this. Partially you need plastic-friendly tools to disassemble your PS4. There are special kits, which include suitable tools.
- Look for the plastic warranty seal near the three ports on the side of the console. Use a suitable tool to carefully remove the seal.
- Under the seal, there is a 5.0 mm Torx T8 type security screw. Loosen this screw by turning it counterclockwise.
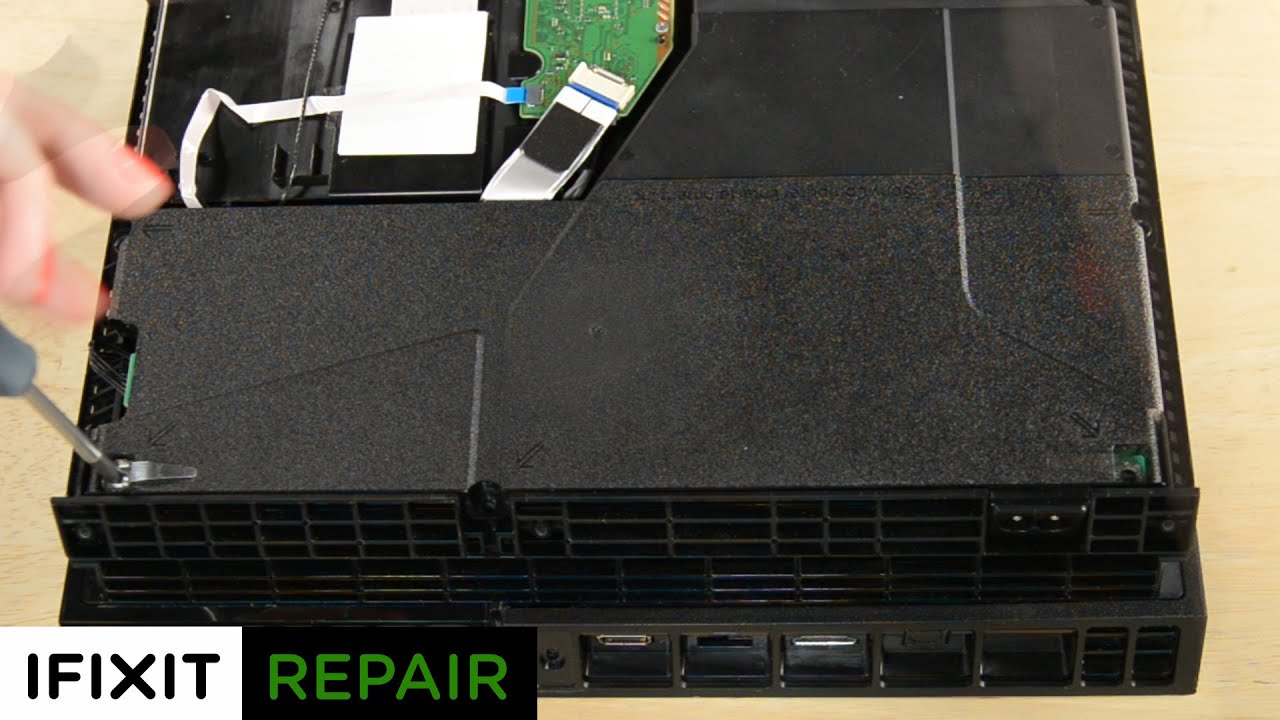
- Place the PS4 with the bottom facing up so that the side with the recently removed screw is facing you. Grab the two corners facing you with your fingers and pull the corners up. You will have to use some force and will hear a loud cracking sound as soon as the bottom plate comes off.
- Slide the bottom plate towards the back and carefully lift it up to remove it.
- Place the PS4 right side up so that the PS Logic Board is on top and the “SONY” and “PS4” labels are facing you.
- Grab the two corners facing you with your fingers and pull them up. This will require some force and you will hear a loud cracking sound as the top cover comes off.
- Slide the cover backwards and then lift it off carefully.
- Loosen both Torx T8 screws, the left being 31.0 mm and the right being 24.0 mm. Now remove the 3.0 mm Phillips screw labeled “1”.
PlayStation 4: How to replace the power adapter
Once you’ve mastered the previous steps, it’s time to move on to removing your PS4’s power adapter:
- Loosen the four Phillips screws, each 16mm long, that secure the PSU to the case. Then carefully remove the power supply from the PS4’s case.
- Lift the metal plate that is above the PSU by hand and remove it.
- Gently pull the antenna cable that is on top of the power supply through the grooves under the metal plate. You can do it with your fingers. Then remove the antenna.
- Place the PS4 on its back. Loosen the Phillips screw 1 with a size of 4.0 mm and remove it carefully.
- Use a plastic opening tool to insert it between the power supply and the console. Gently move the tool back and forth to increase the gap between the two components. Then lift the PSU by hand and turn it onto the back, onto the metal sheet.
- Grab the power supply firmly with your fingers or tweezers and carefully pull it out of the console. Then detach it. Take the power supply unit by hand and lift it out of the console to remove it.
- If you have successfully replaced your console’s power supply, follow these instructions in reverse order for reassembly. Make sure that you tighten all the screws tight enough. Also, remember all parts before putting the console back into service.
PS4 power supply replacement: Important Notes
By replacing your Playstation 4’s power adapter on your own, you can avoid costly repair bills. But besides the correct installation and removal, there are other important things to consider:
- Make sure the power of the new power supply matches that of the original. A weaker power supply could affect the proper functioning of your console.
- Choose a high-quality power supply. Cheap alternatives can damage your console and in the worst case scenario, even cause fires.
- Consider the power supply’s warranty terms for added peace of mind.
- Read the reviews of other customers who have already purchased the same power supply. This will help you better evaluate the quality and reliability of the power supply.