
146
The printer test page allows you to check the printer’s functionality and the ink levels in the cartridges. The procedure varies slightly depending on the operating system.
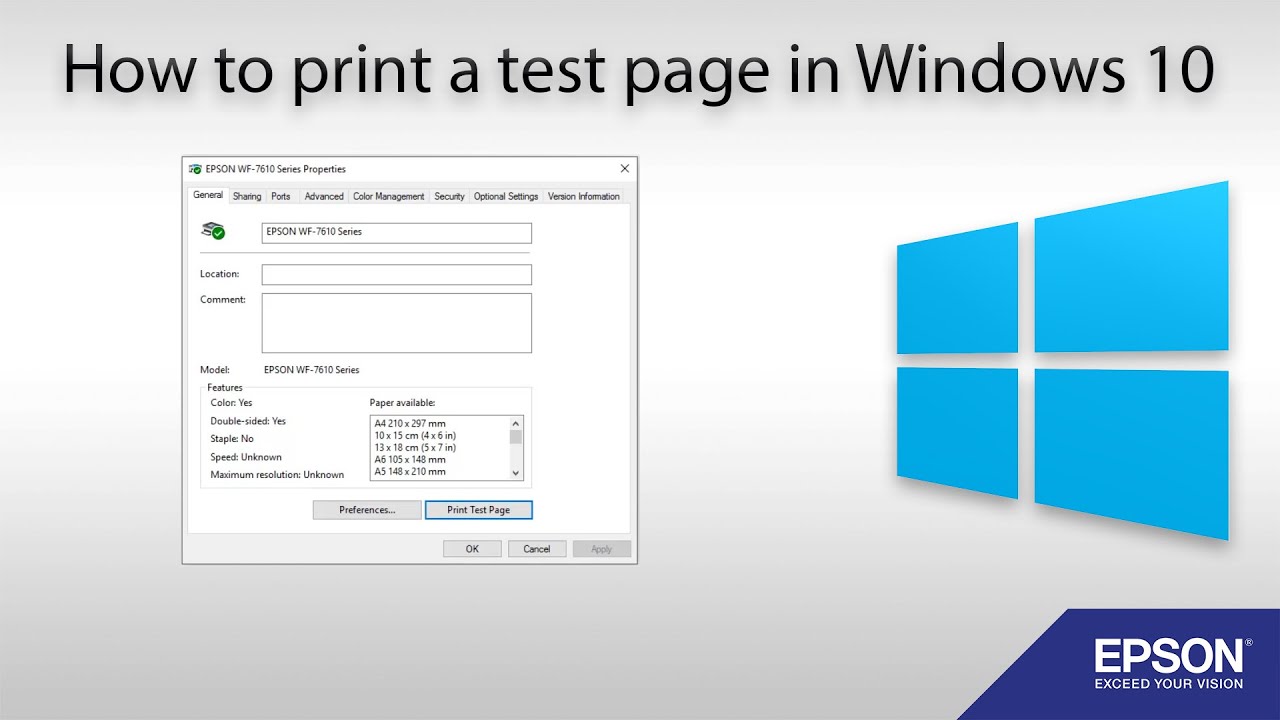
Printer: Test Page in Windows
If your printer isn’t producing the desired results or you’re setting up a new device, printing a test page is the first step in troubleshooting. A test page shows whether the printer is working correctly, whether all colors are printed evenly, and whether the print quality is satisfactory. To print a test page in Windows, follow these instructions.
- Go to “Settings.” Alternatively, you can search for ‘Printers’ in the taskbar search bar to go directly to the “Printers & Scanners” menu.
- Next, select “Bluetooth & Devices” from the left-hand menu, then “Printers & Scanners.”
- In “Printers and Scanners,” select your desired printer and click the right arrow “>” on the right.
- Before printing, make sure the printer is connected to your computer and turned on. Now you can print a test page.
Print a test page on a Mac
Here’s how to check your printer’s ink levels on a Mac.
- Select “System Preferences” from the Apple menu.
- Go to “Printers & Scanners” in the menu.
- Select your desired printer from the printer list.
- Check the queue for any unprinted documents. Then click “Options and Status”.
- In the new window, open “Other”. You can then print the test page.